TL;DR
Set up your console for horror games by reducing screen glare, following the game’s brightness calibration, and choosing an audio mode that matches your headphones or speakers. Update the game, tailor controls and accessibility settings, prepare a safe room, and adjust the experience whenever it stops feeling comfortable.
A horror game can hide a vital clue in a patch of shadow, then make a faint scrape behind you feel like a warning. Your setup shapes how clearly you catch those details—and how comfortable you stay when the tension builds. You don’t need a costly screen or a room built for gaming. A few thoughtful changes to your display, sound, controller, and surroundings can make a familiar console feel ready for a long night.
This guide shows you how to set up a console for horror games with the gear you already own. You’ll learn how to calibrate the image without washing out the dark, choose audio that suits your room, tune controls and accessibility, and make the space comfortable and safe. The key points for a blog article on this subject are simple: clear sound, readable visuals, responsive controls, and personal comfort. A good horror game setup is the one that lets you notice the craft without making you fight your equipment.
Use the game’s brightness calibration first; raising brightness too far can flatten shadows and contrast.
Match the audio setting to your headphones, TV speakers, or surround system, and keep volume comfortable.
Update the console and game, then adjust sensitivity, vibration, captions, and accessibility options to suit you.
Use dim, indirect light if it helps, clear walkways, secure cables, and keep drinks away from electronics.
Test one picture or performance setting at a time, using a familiar scene to judge the result.
Set up your console for horror games
Clear visuals, well-matched audio, and comfortable controls help you catch the game’s details while staying at ease.
Make dark scenes readable
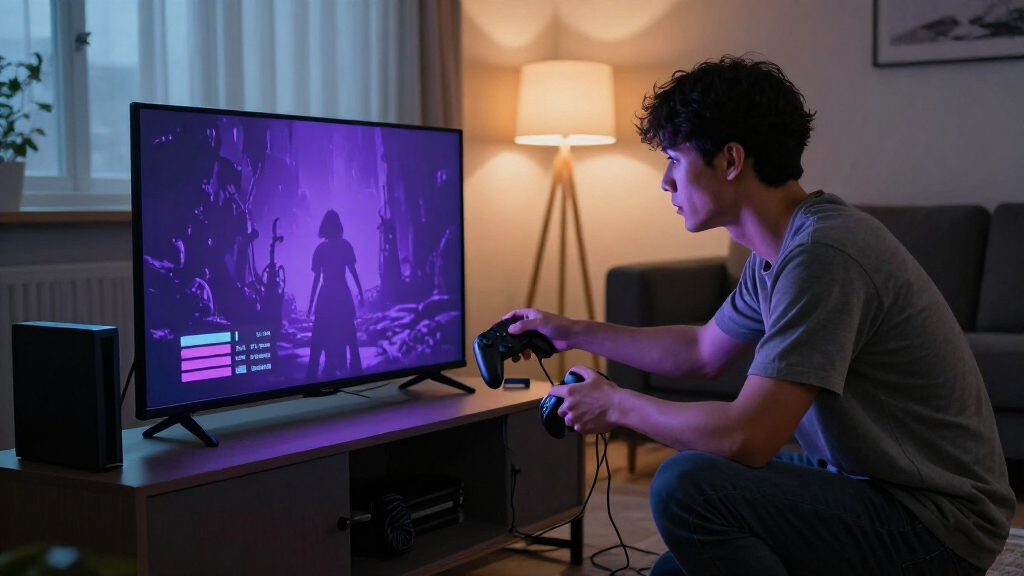
Start with the game’s brightness calibration and reduce reflections before changing picture settings.
Position the screen away from windows and direct lights.
Keep intended clues visible without flattening shadows by raising brightness too far.
Try Game mode and disable motion smoothing if it feels distracting.
Match sound to your setup
Choose the game’s audio mode for the headphones or speakers you actually use.
| Audio setup | Can help with | Check |
|---|---|---|
| Headphones | Quiet and directional cues | Comfortable volume and matching output mode |
| TV speakers | Awareness of the room | Captions if dialogue or soft cues are hard to hear |
| Soundbar or surround | Room-filling sound | Mode and placement suited to your equipment |
Prepare controls and comfort
A few checks before play can keep interruptions and strain from breaking the tension.
Update and charge
Install console and game updates, then check the controller battery.
Tune to yourself
Adjust sensitivity, vibration, captions, and available accessibility options.
Keep it safe
Use dim indirect light if helpful, clear walkways, secure cables, and keep drinks away from electronics.
Make dark scenes readable without washing them out
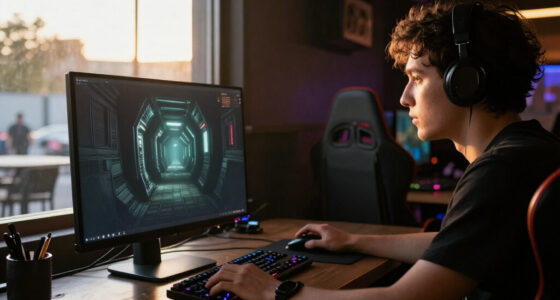
To set up a console for horror games, start by reducing glare and using the game’s brightness calibration; those two changes help you see intended details without flattening the shadows. Put the display where windows and lamps won’t reflect across the screen, then follow the calibration prompt before changing brightness by eye. Dark scenes should still look dark, but clues and paths should remain visible. That balance matters because darkness is part of how the game directs attention: a shadow can conceal danger, frame a clue, or make a lit doorway feel like a decision. If you brighten everything until every corner is visible, you may gain information but lose the contrast and uncertainty the scene was built around.
- Move the screen away from direct reflections. A window opposite your TV can turn a dim corridor into a mirror.
- Choose Game mode or another low-latency mode if your display offers one. It can reduce processing delay, so camera movement feels more immediate. Disable motion smoothing if it adds distracting trails or makes movement feel oddly slick.
- Calibrate HDR on both the console and in the game when both the display and title support it. HDR can preserve detail between bright lights and deep shadows, but mismatched settings may crush dark detail or make the image look washed out. Revisit the settings or try SDR if the result looks wrong.
- Sit at a comfortable distance. You should read small clues without leaning forward or turning your head to follow the action. If you sit too far away, fine details become harder to pick out; too close can make long sessions tiring.
For example, if a note in a dim hallway disappears into black, use the game’s calibration screen first. Raising brightness to maximum can reveal the note, but it can also make a careful pool of darkness look like gray fog. Think of calibration like setting a lantern’s beam: you want enough light to find the door, not so much that the whole room loses its shape. If the calibration target itself is difficult to judge, check the display’s brightness and HDR settings too; the game cannot compensate perfectly for every screen or room.
HDR, high refresh rates, and variable refresh rate can improve some games on compatible displays, but support depends on your console, TV, and title. These features also address different things: HDR changes how brightness and color are represented, while refresh features affect how motion is displayed. A feature is only helpful if the full setup supports it and the result looks or feels better to you. Treat these as options to check, not switches every setup must use. The right picture is the one that shows the scene clearly and responds well when you turn.
Popular right now

Hisense 65-inch U6 Pro Mini-LED 4K UHD Smart Fire TV

TCL 65-Inch QM6K QLED Mini-LED 4K HDR Smart Google TV, 144Hz

eufy C28 Robot Vacuum Cleaner and Mop for Pet Hair, 15,000 Pa
As an affiliate, we earn on qualifying purchases.
Choose headphones or speakers that fit your room
For horror games, choose headphones when you want private, detailed sound, and speakers when you want audio to fill the room or share the experience. The tradeoff is not simply immersion versus quality: headphones can make quiet cues easier to hear, but close, isolated sound may feel more intense or uncomfortable. Speakers can make the game feel less enclosed and let you stay aware of your surroundings, but room noise may mask soft details. Match the game’s audio setting to what you actually use; a surround mode may sound wrong through a simple stereo setup.
| Audio setup | What it can do well | What to check |
|---|---|---|
| Headphones | Make quiet and directional cues easier to hear; keep sound private. | Use a comfortable volume and the matching headphone or stereo setting. If the fit or isolation becomes tiring, take a break or switch outputs. |
| TV speakers | Keep the setup simple, leave you more aware of the room, and make it easy to play with someone nearby. | Dialogue and soft cues may be harder to hear in a noisy room, so captions can help without requiring a louder volume. |
| Soundbar or surround speakers | Make sound feel room-filling and cinematic, especially when the system is positioned and configured well. | Choose the output mode that matches the equipment and room. Reflections and speaker placement can affect how clearly direction comes across. |
Imagine playing alone after the rest of the house has settled. Headphones may reveal a distant footstep without waking anyone, while a soundbar can make a storm roll across the room for a group. Neither option wins every time. If you’re comparing them, replay a scene with a clear sound moving from one side to another and listen for whether the direction feels natural. If the sound seems to come from the wrong place, check the game’s output setting before assuming the equipment is at fault.
Keep the volume comfortable instead of turning it up to catch every whisper. A sudden loud sound can be startling, and pushing the volume higher is not the only way to follow the story. Captions can fill in dialogue that gets lost under music, effects, or household noise; they may also help when you play at a lower volume late at night. Wireless and spatial audio features vary across consoles, headsets, and games, so check compatibility and choose the setting that suits your actual equipment. More processing or a surround label does not guarantee a clearer or more natural result.
Set up your controller before the tension rises
Set up your console and controller before you begin by installing available updates, choosing comfortable controls, and checking the battery. That quick preparation can prevent a patch, awkward camera turn, or low-power warning from cutting into a tense scene. It also gives you a chance to tailor the game before the action gets hectic. Controls matter especially in horror games because attention is divided: you may be tracking a sound or searching a dark room while trying to move precisely. When the camera or button layout feels awkward, that friction can pull you out of the scene.
- Update the console and game. Updates may include stability, performance, or accessibility changes. Installing them beforehand can also avoid an unexpected interruption, though update timing and requirements vary.
- Try the default camera sensitivity in a calm area. Raise or lower it in small steps until you can turn smoothly without overshooting. Lower sensitivity can help with careful inspection, while higher sensitivity can make quick turns easier; the tradeoff is between precision and speed.
- Set vibration and trigger effects to suit you. Keep them on for tactile feedback, lower them if they distract, or turn them off if you prefer. These effects can add physical texture to an event, but repeated or strong feedback can compete with other sensations or become tiring.
- Review remapping, aim assistance, camera, caption, and reduced-motion options. Availability varies by game. Remapping can make important actions easier to reach, while camera and motion options may reduce discomfort; check each setting in context because changing one can affect how familiar the controls feel.
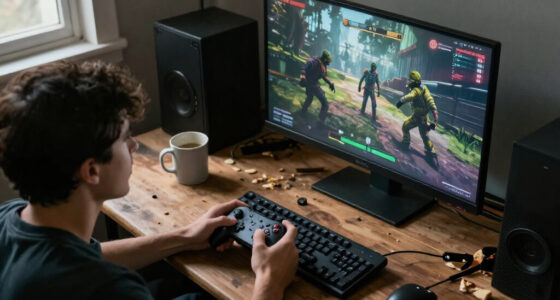
- Charge the controller and put it within easy reach. Keep cables out of your path. A charged controller avoids a preventable pause, and a cable routed safely can reduce the risk of a trip.
In a slow exploration game, moderate sensitivity may make it easier to inspect a shelf or follow a sound. In a faster encounter, you may prefer a quicker turn. There’s no universal number: make one small adjustment, then test it in a safe area before you commit to a longer session. Changing one control at a time helps you tell whether it improved accuracy or simply made the camera feel unfamiliar.
Vibration can make a controller feel like part of the game, but it is a personal setting, not a requirement. A player who finds repeated buzzing distracting can reduce it and still follow the story. Modern releases often offer more caption, control, camera, and difficulty choices than older games, though each title provides its own mix. Give yourself a minute to look through the menus; a small change can make the game easier to handle without changing its atmosphere. If you’re unsure whether a setting helps, try it briefly and switch back if it makes play less clear or comfortable.
Prepare a room that feels eerie and stays comfortable
A comfortable room supports a longer horror session without making the console area hazardous. Dim, indirect light can preserve the game’s atmosphere while helping you see the space around the screen. Complete darkness is optional; if your eyes start to feel tired, a small lamp behind or beside the display may help. The goal is to reduce the difference between a bright screen and a pitch-black room without adding reflections that obscure the picture. A light that is too bright or directly visible can distract you; one placed out of your line of sight can make the room easier to navigate while keeping the display central.
For instance, a player settling in for two chapters might put a warm lamp behind the TV, clear a walkway to the door, and move a drink away from the controller. The soft glow takes the edge off a bright screen between scenes, while a clear floor keeps a dropped controller cable or bag from becoming a trip hazard. Secure cables where you can, and don’t leave a drink perched above the console. These small choices matter because intense scenes can make you shift suddenly or reach without looking; keeping the area clear means the game’s tension is less likely to turn into a real-world mishap.
Comfort also means having a plan for breaks. Pause between chapters, stretch, or step into a brighter room if the session starts to wear on you. Horror games use pacing, sound, and darkness to build tension; you can lower the volume, turn on a room light, or adjust available game settings when you want the experience to ease up. That doesn’t make your setup less immersive. It puts you in control of how you play. A setup that is comfortable enough to return to is often more enjoyable than one that maximizes intensity for a short time and leaves you strained.
Your room should support the game, not make the session harder to enjoy.
Try the setup for a short session before settling in for a long one. Notice whether you can see the controller, reach the power and headset controls, and sit without hunching toward the screen. A little preparation keeps the room’s shadows on screen, where the designers put them.
Fine-tune picture and performance one change at a time
Your best console settings depend on what the game and display support, and whether you value smoother motion, sharper detail, or richer lighting. Some consoles and games offer performance and quality modes; other titles provide few graphics controls. Test available settings in a scene with movement and dark areas, then keep the option that looks clear and feels responsive. These modes can change several visual priorities at once, so the label alone cannot tell you which is better for your game or display.
Think of performance and image quality as two dials you may need to balance. A performance option can favor smoother motion, which may help when you turn quickly or track movement; a quality option can favor resolution or visual effects, which may make environmental details stand out. The tradeoff is that a more detailed image may not feel as fluid, while smoother motion may reduce some visual detail. Neither choice is automatically right for every horror game. A slow, deliberate exploration title may reward richer shadows, while a faster game may feel better when movement stays smooth. The difference is most useful to judge during actual play, not from a menu description.
Change one setting at a time. If you switch display mode, HDR, and brightness together, it’s hard to tell which change improved the image—or caused a dark corner to disappear. A useful test is a familiar scene: check a small object in a shadow, pan the camera, and watch a bright light against a dark wall. This checks both detail and motion, while revealing whether highlights overwhelm nearby darkness. If the image looks inconsistent, compare the game’s HDR and SDR output and review the display’s own settings.
Higher refresh rates, HDR, and variable refresh rate need compatible hardware and game support, and configuration can vary. They solve different problems, and enabling them does not guarantee a visible improvement in every title. Features that work well in one game may not be available in another. Keep your changes modest and reversible; your eyes and hands are better guides than a menu label promising a better picture.
Use a simple pre-play checklist to catch interruptions
A short pre-play check helps your setup feel ready before the first unsettling sound. It takes about a minute: confirm the image, match the audio, test the controls, and clear the space around you. Each check prevents a different kind of distraction: poor calibration can hide clues, a mismatched audio mode can blur direction, and an awkward control setting can make a tense encounter harder than intended. This is especially useful when you move between a shared living room and a bedroom, where lighting, speakers, and controller charging habits may differ.
- Look at the screen. Check for glare, use the game’s calibration prompt, and confirm text and dark details are readable. If the room or display has changed, calibration may need another look.
- Match the audio output. Select headphones, stereo, or surround according to the equipment you’re using; add captions if dialogue is hard to hear. The right mode helps preserve clear dialogue and directional cues without relying on uncomfortable volume.
- Test the controls. Confirm sensitivity, vibration, remapping, and any accessibility options you want. A quick test can catch a setting that feels distracting before a demanding scene.
- Check power and updates. Charge the controller and install updates before a long session if practical. This reduces the chance of a low-battery alert or download interrupting play.
- Clear the area. Move drinks, secure cables, and set a comfortable light level. This keeps the space safe if you shift suddenly or need to get up.
Say you’ve just downloaded a game and want to start immediately. A brief glance at storage and update status can save you from a lengthy pause at the title screen. Digital convenience makes it easy to start a download or use a subscription library, but availability, storage needs, and internet requirements can differ by region and service tier. Check the game’s install status while you tune the room. If it still needs time, using that wait to calibrate or charge the controller is less disruptive than discovering the issue mid-session.
Once you’ve used the list a few times, it becomes a routine instead of another chore. You don’t have to adjust every setting for every session. Check the parts that changed—perhaps you switched from headphones to speakers or moved the console to another display—and let the rest stay familiar. This keeps preparation quick while still catching the changes most likely to affect the experience.
Adjust the scare level when your comfort changes
A good horror setup gives you room to change the experience when you need to. Lower the volume, switch to speakers, add a light, pause, or use available accessibility and difficulty settings. These options affect different parts of the experience: speakers can reduce the sense of isolation, a lamp can make the room feel less enclosed, and lower volume can soften sudden peaks without changing the picture. Some games let you reduce certain effects or adjust camera movement; others don’t, so review the options the title provides instead of assuming every control exists.
Consider a late-night session where a headset makes a quiet corridor feel especially intense. You can take the headset off and use TV speakers, turn on a lamp, or stop at the next save point. Those choices change the mood, but they don’t erase the design or your progress. Your setup is a set of controls you can use to shape the evening. A useful approach is to change one thing first—such as audio output—so you can tell whether that adjustment is enough, rather than feeling you must either endure the scene or stop playing entirely.
Personal comfort also shifts with context. A scene that feels fun during a relaxed afternoon may feel like too much when you’re tired or playing in a noisy shared room. You can reduce vibration, enable subtitles, adjust the camera, or choose a different difficulty when the game offers those options. These settings address different friction points: captions preserve dialogue at lower volume, camera options may make movement easier to tolerate, and difficulty adjustments can reduce pressure during encounters. They can help you stay engaged with the story and craft on your own terms.
There is no single correct level of darkness, volume, or intensity. If a setting makes you strain, lose dialogue, or feel distracted by the controller, change it. Comfort is not a fixed target, and revisiting settings is reasonable when the room, time of day, or your mood changes. The aim is a clear, responsive, comfortable game setup—not a test of how much discomfort you can tolerate.
Frequently Asked Questions
Do I need a special TV or monitor for horror games?
No. A standard display can work well when you reduce glare, use a responsive picture mode if available, and calibrate brightness in the game. Those adjustments often matter more than buying a premium screen.
Should I play in complete darkness?
You don’t have to. A dark room can suit the mood, but dim, indirect light may feel more comfortable during a longer session and makes it easier to see your surroundings. Try a small lamp behind or beside the display.
Are headphones better than speakers?
Headphones can make subtle directional sounds easier to hear and keep audio private. Speakers or a soundbar can fill a room and work better for shared play. Choose the output setting that matches your actual equipment.
What brightness should I use?
Start with the game’s brightness calibration instructions and adjust only enough to reveal details the game intends you to see. Turning brightness all the way up can flatten contrast and make shadows look gray. If HDR looks too dark or washed out, review the console and display settings or try SDR.
Should I use HDR for horror games?
Use HDR if your console and display support it and the calibrated image looks right to you. Support and results vary by game and screen. If dark scenes lose detail or bright areas look washed out, check the settings or compare with SDR.
How can I make jump scares feel less intense?
Lower the volume, use speakers instead of headphones, turn on a room light, or take a break. Check the game’s accessibility and content settings for options such as reduced motion or changes to particular effects; availability varies by title.
Conclusion
Start with four things: calibrate the screen, match the sound to your equipment, tune the controller, and make the room comfortable. You can do all of that with a standard display and the gear already in your home. Change settings one at a time, and keep the choices that let you follow the action without strain.
The best horror setup leaves the shadows on screen and gives you a clear path through the room. When the next quiet footstep lands just behind you, you’ll know your equipment is ready—and you can decide how close you want to listen.