
TL;DR
To display horror figures without crowding a shelf, choose a small group, vary their heights and positions, and leave open space around the pieces you want people to notice first. Measure figures and accessories before arranging risers, keep lighting soft, and rotate the rest of your collection to give more pieces a turn.
One tiny figure has room to breathe on Monday. By Friday, three friends, a miniature gravestone, and a web of accessories have joined it, and the shelf looks like a crowded midnight screening. You can make the collection feel more dramatic by displaying fewer pieces at once.
This guide shows you how to display horror figures so the faces, poses, and paint details stay visible. You’ll learn how to edit a lineup, use height and depth, group figures with purpose, and choose lighting and storage that suit the collection. The same ideas work whether you have one narrow shelf or a whole cabinet of monsters.
Choose a small focal group before arranging the shelf, then rotate other figures in over time.
Measure the shelf, full figure poses, and accessories before buying risers or changing shelf heights.
Use staggered heights and offsets so faces and distinctive details remain visible from the room.
Keep backgrounds and props restrained, and use soft, indirect light to reveal sculpt details.
Protect figures from direct sunlight, heat, and damp; check weight guidance for shelves and mounting hardware.
COLLECTOR’S FIELD GUIDE · DISPLAY DESIGN
How to Display Horror Figures Without Crowding a Shelf
A great horror display gives every sculpt room to be seen. Choose a focused group, vary height and depth, and let open space guide the eye. Then rotate the rest of your collection in over time.
One shelf cannot hold the whole collection. A rotating display can show it all over time.
Clear sightlines make faces, poses, and paint details stand out. Think of empty space as part of the composition.
Start with fewer figures and give favorites room
There is no perfect number for every shelf. The right lineup depends on shelf depth, pose size, and whether each face stays visible from the room.
Pick the lead
Choose the character you want people to notice first. Give its silhouette a visible gap from nearby pieces.
Add a few companions
Use supporting figures or one mood-setting prop to make a coherent scene. If every item competes, remove one.
Give the rest a turn
Store the remaining figures safely and swap them in seasonally or whenever you want the shelf to feel new.
Try the doorway check: Step back to where you usually enter the room. Can you see each face, mask, and distinctive accessory without another figure cutting across it?
Keep open space visible. A clear outline helps a detailed sculpt read as a character, instead of blending into a row of competing shapes.
Measure first, then stagger the silhouettes
Use vertical space to improve sightlines. A stable riser can lift a smaller figure just enough to reveal its face without adding shelf width.
Include the whole pose
Note shelf depth and clearance. Measure with hats, raised arms, long hair, and weapons attached.
Tall behind, short ahead
Place taller figures toward the back. Offset shorter ones so their faces remain visible between them.
Test the viewing angles
Look from the doorway and your usual seat. Shift any piece that hides a face or distinctive detail.
Risers work when they are stable. Check that the base fits securely and does not wobble near an edge. Confirm there is clearance above before raising a figure.
Pose beats body height. A shorter figure with arms spread may need more room than a taller figure with a compact stance. Plan the full outline.
Connect mixed figures with one simple idea
Group by series, relationships, color, or mood. A subtle connection gives the eye a path through the shelf without needing a full miniature set.
Repeat a visual note
Link different lines with a shared color, like pale faces, dark clothes, or one muted red accent.
Suggest a small scene
Let a focal character sit slightly forward, with supporting pieces turned toward it or toward the room.
Use punctuation, not clutter
One gate or framed image can set the mood. A row of unrelated props can bury the sculpts.
Three or five can be a useful starting point for a balanced group, but it is not a rule. Large bases, sweeping poses, and bulky accessories may call for fewer pieces.
Quick edit: Remove one item and look again. If the remaining figures become easier to recognize, the shelf needed more breathing room.
Build a shelf that reads at a glance
A small figure with a wide stance, long hair, raised weapon, or oversized hat can occupy more visual space than its height suggests. Plan for the whole silhouette, not just the body.
Sketch the footprint
Use paper outlines or removable painter’s tape to map the full pose and its neighbors before moving the collection.
Angle to open sightlines
Turn a sprawling figure slightly toward the back if that keeps its accessory within its space and clears another face.
Reassess the shelf
If the pose still overwhelms the group, give it an end position or a shelf of its own.
From crowded row to readable vignette
Use this repeatable sequence whenever you refresh a shelf or rotate figures into view.
Reveal the details and protect the collection
Lighting and storage should support the display without adding glare, heat, or risk to the figures and shelf.
| Display choice | Helps with | Check before you commit |
|---|---|---|
| Soft LED lighting | ✓ Shows sculpt and paint detail | Position to avoid glare; follow light instructions and keep heat away. |
| Acrylic risers | ✓ Adds height without much shelf width | ~ Use a stable, appropriately sized base to reduce tipping. |
| Enclosed case | ✓ Helps reduce dust | ~ A case may not block all UV light; check materials and placement. |
| Window or heater nearby | ✗ Can expose figures to fading or heat | Keep figures out of direct sunlight and away from heat sources and damp. |
| Wall-mounted shelf | ✓ Frees furniture and floor space | Check weight guidance for both shelf and mounting hardware. |
Make room for the horror to breathe
A calm shelf can still feel dramatic. Keep its arrangement deliberate, its details visible, and its contents easy to refresh.
Every face has a view
Check from the room, not just close up. Move or remove anything blocking a mask, expression, or key accessory.
One restrained accent
Choose a neutral background and a limited color note. Let the figures carry the scene.
Care for the shelf
Dust regularly, avoid sunlight and damp, and check shelf and hardware weight limits before adding heavy pieces.
Start with fewer figures and give your favorites room
A horror figure shelf looks clearer when you show a handful of pieces at once, with visible gaps around the figures you want people to notice first. Edit the lineup before you move furniture or buy risers. Space helps a sculpt read as a character instead of becoming one shape in a row of competing shapes.
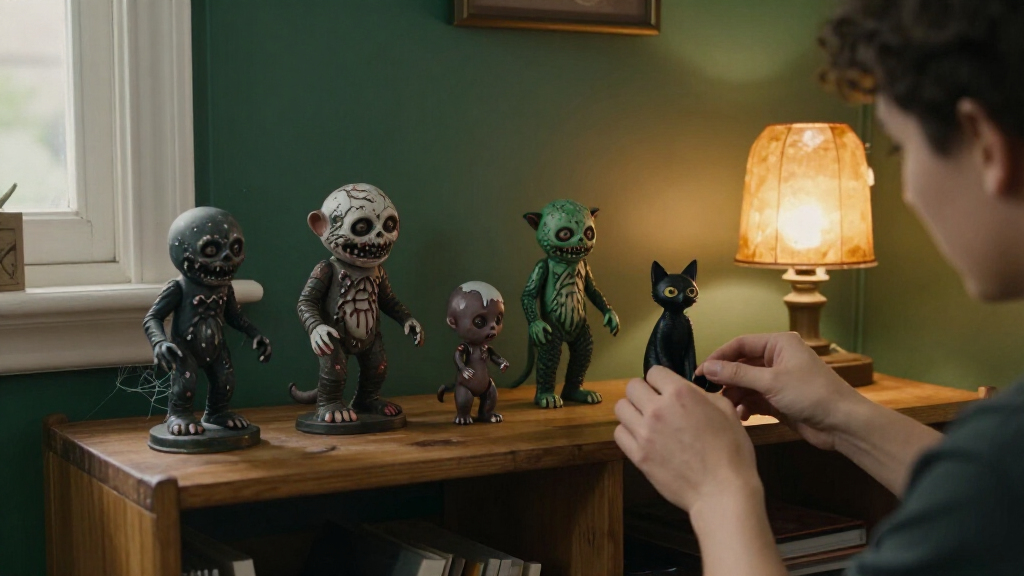
Take everything off the shelf and sort the figures into three groups: the ones you want to feature, the ones that support that scene, and the ones you can rotate in later. For example, a collector with eight figures might choose three for the current shelf: one familiar masked character as the focal point, a smaller figure beside it, and one accessory that helps set the mood. The other five can rest safely until the next display change.
There is no reliable number of figures that fits every shelf. A wide, deep ledge can accommodate more than a narrow bookcase, and a dynamic pose needs more room than a compact figure standing straight. Check whether you can see each face and distinctive accessory from where you usually enter the room. If a hand, hat, or mask disappears behind another figure, remove or reposition something.
Keep open space visible. It gives a detailed sculpt its own outline and gives the whole arrangement a calmer rhythm. If you love every piece, a rotation schedule lets each one have a turn without making the shelf carry the entire collection at once.
A shelf is easier to read when each figure has a clear outline and at least one unobstructed view.
Popular right now

KitchenAid Classic Series 4.5-Quart Tilt-Head Stand Mixer, Onyx Black

Shark Rocket Ultra-Light Corded Stick Vacuum, HV301, Gray/Orange

TCL T7 Series 85-Inch 4K 144Hz QLED Smart Google TV
As an affiliate, we earn on qualifying purchases.
How to display horror figures at different heights
- Measure the shelf and figures. Note the shelf’s depth and height, then measure each figure with its tallest accessory attached. Raised arms, broad hats, and pointed hair can need more clearance than the body suggests.
- Place tall figures toward the back. Set shorter figures in front, then offset them so faces and important details remain visible.
- Add a stable riser only where it improves sightlines. Check that each figure’s base fits securely and does not wobble near the edge.
- Step back and check the view. Look from the doorway and from the chair or sofa where you normally see the display. Shift anything that hides a face.
These steps make the shelf use more of its vertical space without turning it into a stack. A clear acrylic riser can lift a smaller figure just enough for its face to appear between two taller pieces. But a riser needs a stable, appropriately sized base; an unstable platform can tip when you dust or reach for another figure.
Imagine a shelf with a tall creature at each end and a short figure in the center. A low riser beneath the center figure may open the view, while moving one tall figure slightly to the side prevents a straight line of blocked faces. That small change can make the whole group look intentional. Check shelf clearance before raising a platform, especially if the top figure has horns, a blade-shaped accessory, or a dramatically lifted arm.
Use height to help your eyes move across the scene, not to fill every gap. If the figures already have dramatic silhouettes, a simple stagger may work better than several platforms. Measure first so an attractive arrangement does not leave accessories pressed against the shelf above.
Build a small theme that makes mixed figures feel at home
Group figures by a visible connection—such as color, series, character relationships, or mood—so different sculpts feel like parts of one display. A common theme gives the eye a path through the shelf and keeps each piece from demanding attention at once. The connection can be subtle; you do not need matching figures or a full miniature set.
For example, a collector might place three figures with pale faces and dark clothing together, even if they come from different stories. A charcoal backdrop and one muted red prop can tie them together, while the figures’ different heights keep the arrangement from looking like a lineup. Another shelf might pair a central character with two supporting figures from the same series. Let the focal piece sit slightly forward, with the others turned toward it or angled toward the room.
Groups of three or five can feel balanced because an odd number often avoids a rigid, mirrored look. That is a useful starting point, not a rule: broad bases or sprawling poses may call for fewer pieces. If every figure has a large accessory, three may already feel crowded. A quick test is to remove one item and see whether the remaining pieces become easier to recognize.
Keep the background restrained. A dark or neutral backing can suit horror figures, while a single accent color can echo a painted detail. Busy patterns, many props, and several competing colors make a small shelf feel even fuller. Treat props like punctuation: one miniature gate or framed image can establish a scene; a row of unrelated objects can bury it.
- Use a shared color to connect figures from different lines.
- Use a character relationship to suggest a small scene.
- Use one restrained prop to set the mood without hiding the sculpts.
Make large accessories part of the plan
A figure with a wide stance, raised weapon, long hair, or oversized hat needs room for its full silhouette. Measure the complete pose, including accessories, before you decide where it belongs. If you arrange pieces by body height alone, the actual outline can spill into a neighbor’s space and make both figures harder to see.
Try a simple shelf sketch before moving the collection. Mark the footprint of a dynamic figure with painter’s tape or a paper rectangle, then add smaller outlines for the figures you want beside it. A six-inch figure with arms spread may take up more visual space than a taller figure with a compact pose. If the accessory reaches across a face or blocks the path to another figure, give it an end position or a shelf of its own.
For instance, a collector may want to display a figure holding a long accessory beside a smaller character. Turning the large figure a few degrees toward the back can keep the accessory within its footprint while leaving the smaller face visible. If the pose still overwhelms the shelf, make it the focal point and move the supporting figure to another level. The goal is to show the sculpt’s intention, not force every piece into the same row.
Also leave clearance above and in front of dynamic poses. A hat touching the shelf overhead can scrape paint when you slide a figure out, and a blade or raised hand close to the edge may catch a sleeve during dusting. Check the arrangement from several angles and after opening any cabinet doors. A scene should look composed when viewed from the room, not only from directly in front.
Choose lighting and a backdrop that let details show
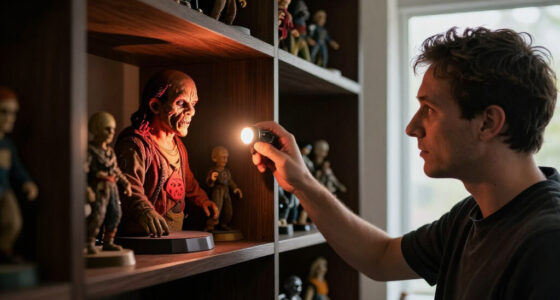
Soft, indirect lighting can bring out sculpted folds, painted eyes, and worn-looking textures without making the shelf visually louder. Pointing a bright lamp straight at glossy faces can create glare that hides the very details you want people to see. A restrained backdrop gives those details room to stand out.
Low-heat LED lighting is a common display choice because LEDs generally produce less heat than many traditional bulbs. They still need safe placement: follow the lighting instructions, keep strips or lamps from pressing against figures, and avoid aiming a bright beam directly into the viewer’s eyes. For example, a small light placed above and slightly forward of a dark shelf can reveal the texture on a coat while leaving the lower background subdued. If the paint shines like a mirror, shift the light to one side.
Keep the backdrop simple enough that the figures remain the main event. A matte black or deep gray panel can make a pale mask visible; one muted accent color can connect a set of figures with similar details. A patterned wall, multiple colored lights, and a cluster of props can all compete with the sculpts. Try the display under the room’s usual lighting before you settle on a backdrop, since a shelf that looks balanced in bright daylight may feel very different at night.
Pay attention to sunlight and heat as well as style. Sunlight can fade paint and damage some materials over time, and an enclosed case does not necessarily block all ultraviolet light. Keep figures away from direct sun, heaters, and damp areas. A display that protects the collection can still feel atmospheric: use a dim, indirect light and let the silhouettes do the work.
Choose open shelving or a case based on how you use the collection
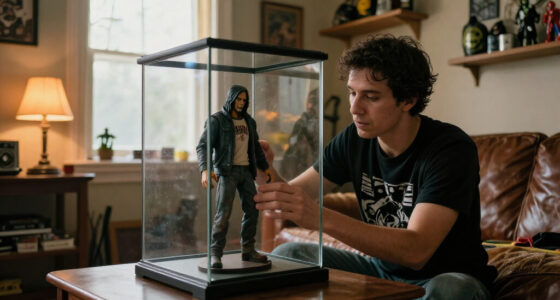
Open shelves make it easy to rearrange and handle figures, while an enclosed case can reduce dust and add a clear boundary around a display. The right fit depends on your room, how often you change the arrangement, and how you plan to clean the collection. Neither option removes the need to check light, heat, stability, and viewing angles.
| Display choice | What it helps with | What to check |
|---|---|---|
| Open shelf | Easy access for rotation, posing, and rearranging | Dust buildup, sunlight, and secure figure placement |
| Enclosed case | A boundary around the scene and less frequent dust exposure | Clearance, case stability, lighting, and UV exposure |
| Wall shelf | Uses wall space when floor furniture is limited | Weight guidance for both shelf and mounting hardware |
Picture a small bedroom shelf near a sunny window. A glass door may make the scene feel finished, but it does not automatically protect figures from UV light. Moving the shelf out of direct sun matters more than assuming the enclosure solves every exposure issue. In another room, an open shelf may suit a collector who changes themes every month and can dust regularly.
Before installing a heavy shelf, check the manufacturer’s weight guidance for the shelf and its mounting hardware. Include the figures, risers, and props in your estimate. Modular shelving can make later changes easier, but any unit still needs a stable position and appropriate support. Take measurements before buying storage so a tall hat or raised arm does not collide with the next shelf.
Refresh the display with a simple rotation routine
A rotation gives more figures a place in your room without crowding one shelf. Choose a few pieces for the current scene, store the rest safely, and swap a small number when you want a fresh look. The shelf stays legible while the collection keeps moving.
For a practical example, a collector with twelve figures might display four at a time and change the group at the start of each season. One rotation could feature monochrome figures against a dark backdrop; the next could bring forward a colorful set or a character with a striking sculpt. Keep a short note on which figures you displayed and where you stored them, especially if accessories are small or easy to mix up.
When you make a swap, start with a clean shelf and check the figure bases for dust. Set accessories aside in a labeled tray while you work, then return each piece to a stable position. A rotation does not have to follow a strict calendar: a new figure, a room change, or simply wanting to see a different sculpt can be reason enough. If you enjoy a particular arrangement, leave it up until it stops feeling fresh.
Storage matters between turns. Keep figures away from direct sun, heat, and damp areas, and choose a place where they will not be squeezed against loose accessories. Avoid stacking pieces in a way that presses on raised details. That care makes the next display change feel like bringing out an old favorite, not uncovering a dusty puzzle.
Frequently Asked Questions
How many figures should I put on one shelf?
There is no single number that fits every shelf. Start with a few figures, then check whether each face, pose, and distinctive accessory remains visible; a wide figure may need more room than a taller one with a compact stance.
How much space should I leave between horror figures?
Leave enough room that neighboring silhouettes and accessories do not merge from the main viewing angle. Try placing the figures, stepping back, and widening any gap where a face or important sculpt detail disappears.
Should taller figures go in the back?
Often, but height alone does not decide placement. Put taller figures toward the back and shorter ones forward, then offset them or use a stable riser if the taller pieces hide faces.
Are acrylic risers worth using?
They can help smaller figures stay visible without taking up much shelf width. Measure the figure’s base and choose a stable riser with enough surface area; a wobbling platform can tip during dusting or rearranging.
What lighting works well for horror figures?
Soft, indirect LED lighting can show paint and sculpt details while producing less heat than many traditional bulbs. Follow the light’s instructions, keep it safely positioned, and adjust the angle if glare obscures faces.
How can I protect figures from fading?
Keep figures away from direct sunlight and heat, and dust them regularly. A glass case does not necessarily block all UV light, so choose the display location carefully even when the figures sit behind glass.
Conclusion
To display horror figures without crowding a shelf, start by choosing what deserves the spotlight. Give that focal piece room, arrange a few supporting figures where their faces remain visible, and let the rest take turns in a safe rotation.
Measure before you add a riser, check the light before you settle on a spot, and leave a little darkness around the details. A quiet gap can make a familiar figure look like it just stepped out of the shadows.